





How to Hide a Lavalier Mic Without Clothing Noise
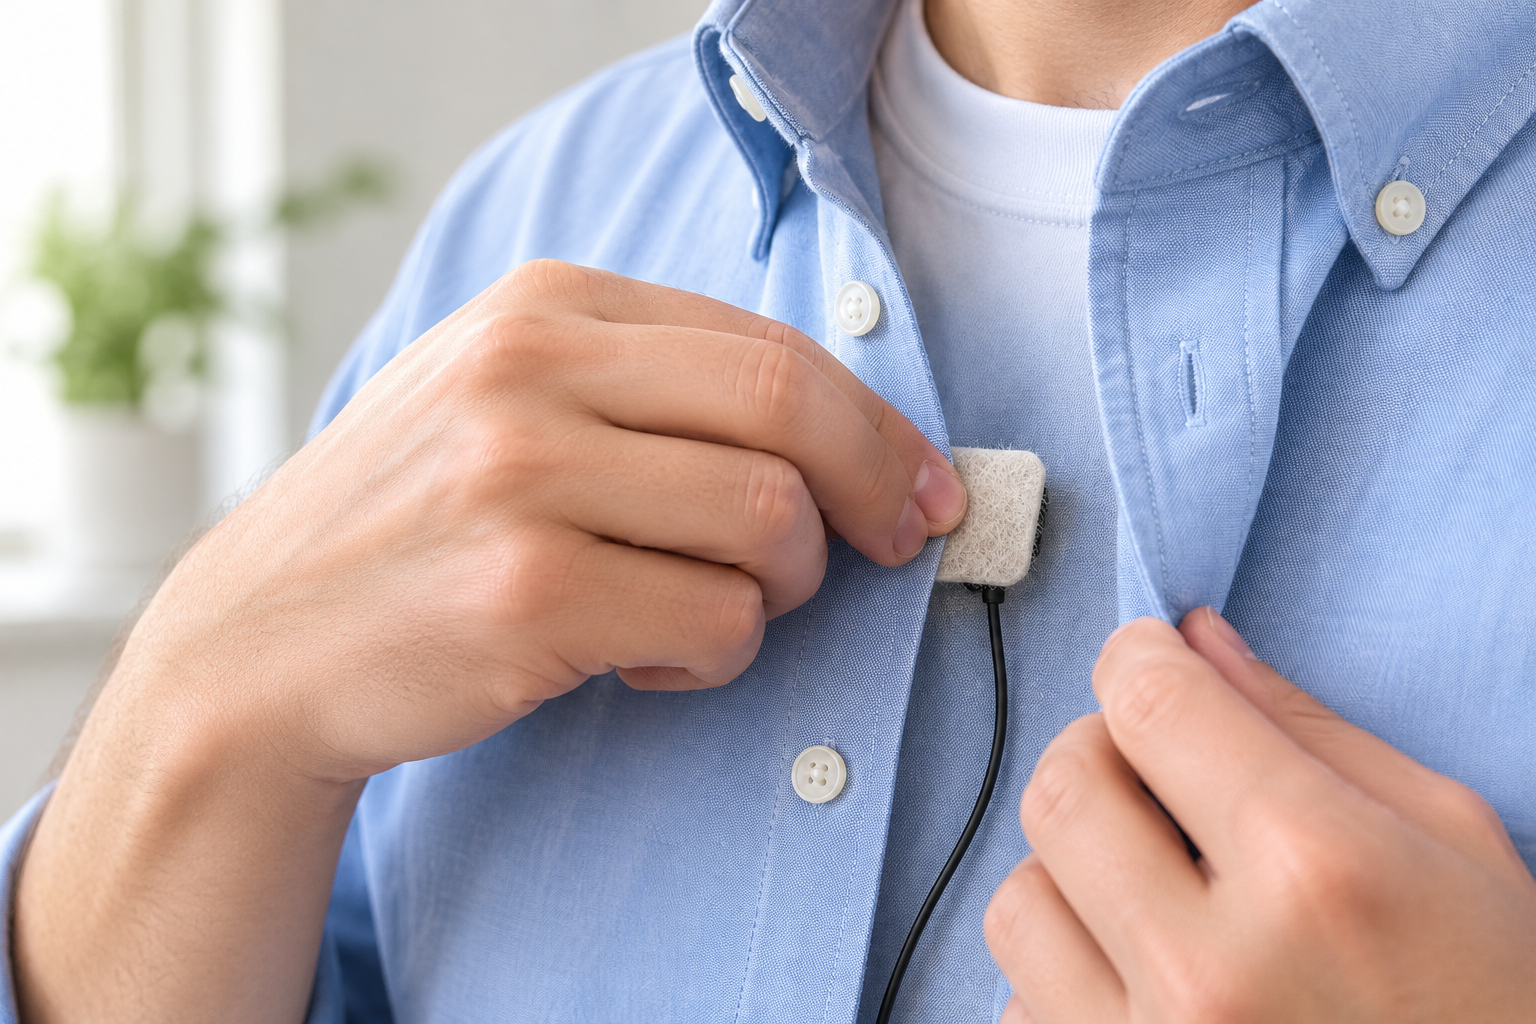
To hide a lavalier mic, put it on the centre of your chest, about a hand-span below your chin. Mount it so fabric cannot touch the capsule (the tiny sound-sensing tip). Then tape a small loop in the cable so tugs and body movement do not reach the mic.
Hiding a mic is easy. Hiding it and keeping the audio clean is the hard part. A mic under clothing hears every fold and rub of fabric, and that noise sits in the same range as speech. You cannot filter it out later without dulling the voice.
This guide covers three things: where to place the mic, how to stop clothing noise, and how to secure the cable. It does not compare mic types. For that, see our lavalier vs handheld microphone guide.
| Your situation | Where to mount | What to use |
|---|---|---|
| Button-up shirt | Behind the placket, above the sternum | Clip or tape, with a cable loop |
| T-shirt or dress | Inside the garment, on the chest | Vampire clip or tape with a soft cover |
| Tie | Behind the knot or tie | Small concealer mount or tape |
| Jacket | Back of the lapel | Clip, cable under the jacket |
| Outdoors, under clothing | Chest, under a fur cover | Fur cover on a tape base |
Where to put a hidden lav mic
Start on the chest. RØDE recommends a spot about a hand-span (20–30 cm) from the mouth, which gives a natural sound (RØDE: how to use a lavalier mic). Shure says to place it above the sternum, also called the breastbone (Shure: how to choose a lavalier microphone).
Height matters in both directions. Shure’s presenter guide says that if the mic is too high, the chin shadow makes you sound muffled. If it is too low, the level drops and the voice sounds distant (Shure: mic techniques for presenters). One more detail from Shure’s lavalier user guide: 76–152 mm (3–6 in) below the neckline works well for its MX183 series (Shure MX183/184/185 user guide).
Two small tweaks help:
- Shift the mic to the side the speaker turns toward. Then a head turn moves the mouth toward the mic, not away from it (Nomono: lavalier mic placement).
- Avoid sitting right under the neck. RØDE warns that a mic directly under the neck can sound coloured. A looser neckline or a slight move to the side fixes it.
Hair placement is a last resort. Hollyland rates it as the lowest-quality position, so use it only when there is no clothing anchor (Hollyland: how to hide a lavalier microphone).
Pick a mount that keeps fabric off the capsule
Noise comes from fabric rubbing the capsule, or from the mic moving with the cloth. So the mount has two jobs. It holds the mic still, and it keeps a small air gap around it. Here are the common options.
Tape triangles. Audio-Technica describes folding tape into two sticky-side-out triangles. You place the mic between them without blocking its sound ports. The triangles stop clothing from rubbing the mic and insulate it from vibration (Audio-Technica: hiding the lavalier mic, part 1).
Moleskin and a safety pin. Wrap moleskin around the mic, leave the sound ports open, and pin it to the inside of the clothing. The soft texture reduces friction (Audio-Technica: part 2). Hollyland adds a useful twist: fold the moleskin into a small arch so the capsule hangs in an air gap between skin and fabric.
Vampire clip. This clip has two small teeth. It grips a T-shirt or dress that a normal clip cannot hold (RØDE: lavalier mounting best practices).
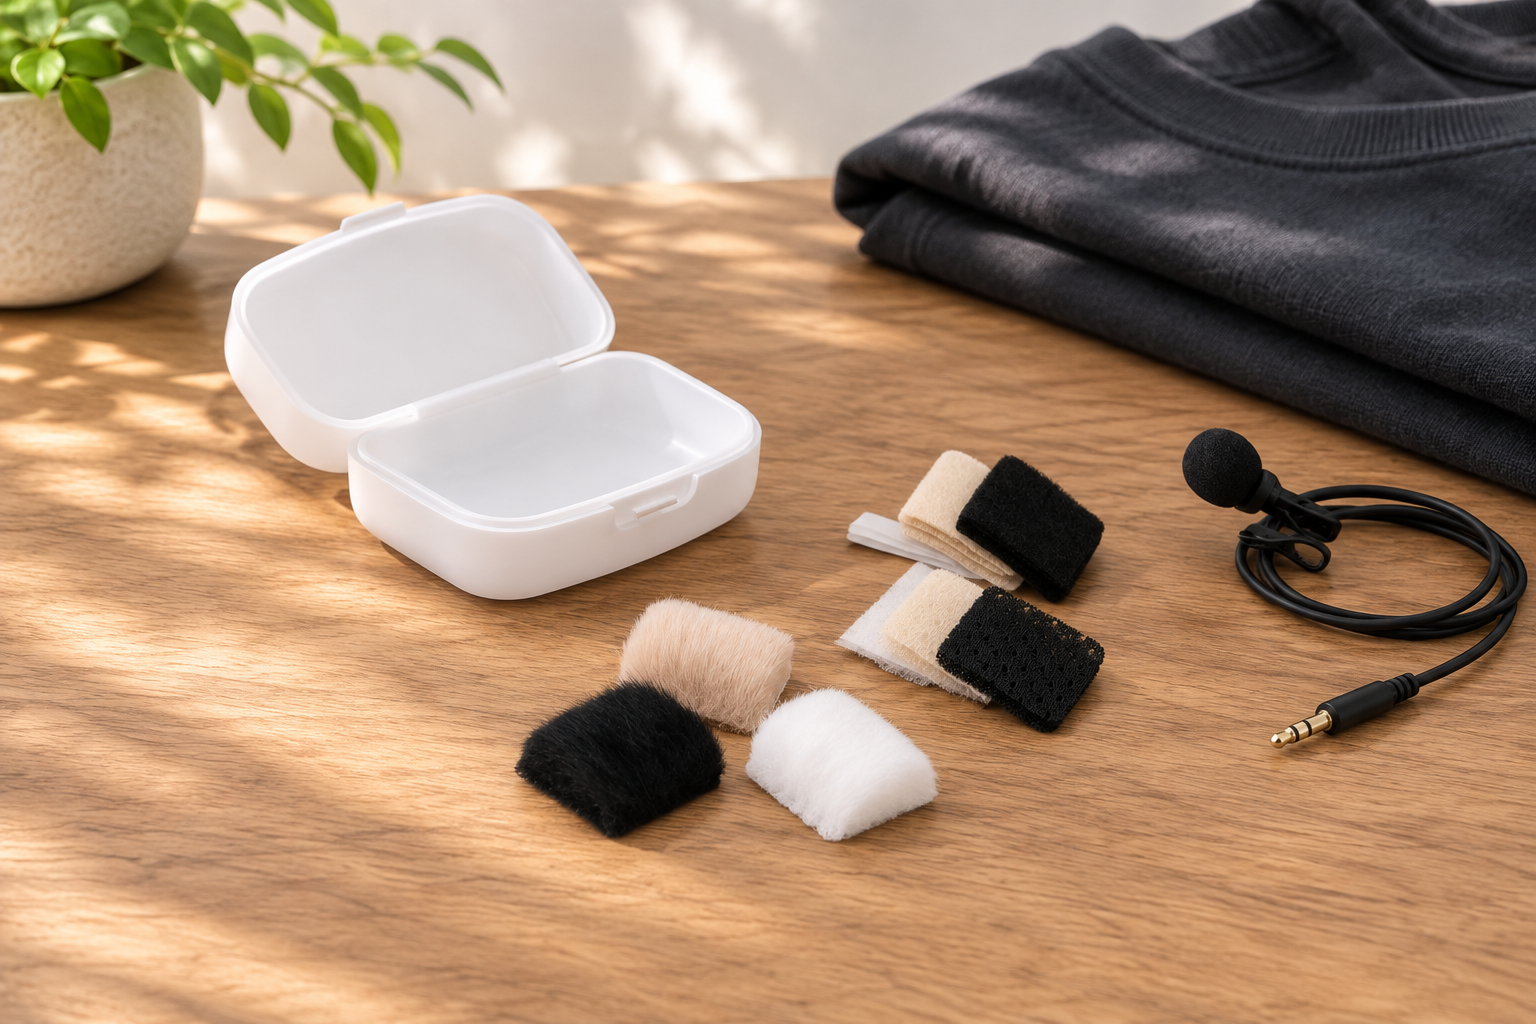
Ready-made covers. Purpose-built lav covers do the same job faster. Rycote’s Undercovers, for example, use a soft fabric disc over the mic to reduce clothing rustle and low wind noise (Rycote: lavalier solutions). We stock a similar approach from BUBBLEBEE. Its starter kit has Original, Moleskin and Fur Outdoor covers, plus double-sided hypoallergenic tape with a window that keeps adhesive off the capsule. It also has a skin tape for the cable. You can browse the full range in our audio microphones category.


If you hide mics often, covers and tape are worth it. They save time, and they give the same result every time. If you hide a mic once or twice a year, tape triangles from a roll of gaffer or camera tape work fine.
Stop clothing noise before you record
Fabric choice changes the result a lot. In a comparison by Production Expert, cotton gave the least audible rustle, with velvet close behind. Silk rustled badly even with small movements, and polyester was nearly as bad. A heavy wool jumper also dulled the high frequencies, even though it did not block the capsule (Production Expert: best and worst fabrics for lavalier mics). Nomono’s guide agrees: synthetic shells, silky fabrics, stiff new denim and heavy zippers cause the most trouble, while soft cotton and wool usually behave.
Use this when you can influence what people wear:
- Ask your talent to wear plain cotton or a thin wool blend.
- Avoid silk, shiny synthetics, fleece and stiff jackets.
- Ask them to leave off long necklaces and loud jewellery. Shure warns that a necklace can bump the mic.
- Check what they will wear before the shoot day, so you can prepare the right mount.
If you cannot control the outfit, mount the mic on a layer that moves with the body, such as the jacket front. Do not mount it on a loose layer that slides over another layer.
Always test. Ask your talent to talk, turn their head, sit down, stand up and wave their arms. Listen on headphones. If you hear rustling during a head turn, the cable run is probably too tight (Hollyland). Fix it now. DJI also advises a test recording after every setup.
Outdoors, wind adds a second problem. A fur windshield over the mic reduces wind noise. When the mic sits under clothing, a fur cover on a tape base does the same job and hides well.

Secure the cable so it cannot thump
A loose cable is the second big noise source. When it swings or pulls, the movement travels up to the capsule as thumps.
The fix is strain relief. Audio-Technica’s method: form a nickel-sized loop of cable close to the mic head. Tie it off with thread or tape, loose enough that it can still “breathe” when tugged. This loop blocks cable noise and vibration. RØDE suggests a second loop below the mic clip, stuck together with a small piece of tape. Run the extra cable behind the fabric, so the front shows only the mic, the clip and a small loop.
Next, anchor the cable where the body bends. Hollyland suggests taping a short loop behind the button gap, and holding the cable to the inside of the shirt with a small piece of tape. If the shirt pulls during movement, the loop takes the strain before the capsule does. For cable that must run on skin, use breathable, sweat-proof skin tape. Stop and remove it if the skin gets irritated.
Then route the cable down to the transmitter at the waistband or in a pocket. Two rules apply to the transmitter:
- Do not cover the antenna. Sennheiser advises clipping the bodypack so the antenna stays free, to keep full transmission power (Sennheiser: head-worn and lavalier microphones).
- Plan for dresses and costumes. A thigh strap with a sideways pouch can hide a transmitter under a short dress or shorts. One maker lists it as 8 cm tall (URSA thigh strap). A pouch sewn into a costume is another option.
If the signal drops out even with the antenna free, the cause may be radio interference. Our wireless microphone frequency and interference guide covers frequency bands and channel coordination. If you record straight to a camera, see how to connect a microphone to a camera.
Hide a lav under a shirt: step by step
- Check the shirt and ask the wearer to remove loud jewellery.
- Pick the mic spot: centre chest, above the sternum, a hand-span below the chin.
- Make the cable loop close to the mic head and tape it.
- Mount the mic inside the shirt with a soft cover or tape triangles. Keep the capsule face toward the mouth and the sound port clear.
- Tape the cable to the inside of the shirt, below the mic.
- Run the cable down to the transmitter and clip it on with the antenna free.
- Record a test. Talk, turn, sit, stand and walk, then listen on headphones.
When hiding the mic is not worth it
Hidden mics have a cost. A concealed lav puts more material between the voice and the capsule, and DJI notes that thick clothing can muffle the sound. A hidden mic also rubs more and sweats more. Sound crews on location-sound forums often advise hiding mics mainly when a retake is possible, because rustle can be hard to judge until playback.
So hide the mic only when the picture needs it, as in drama, weddings or stage work. For interviews, talks and tutorials, a small visible mic on the placket or lapel gives cleaner sound and takes seconds to fix. In a very noisy room, a closer mic helps more than a better hiding trick. Our guide on recording audio in a noisy environment shows how.
Key Takeaways
- Place the mic at the centre of the chest, above the sternum, 20–30 cm from the mouth. Move it slightly toward the side the speaker turns to.
- Keep fabric off the capsule with tape triangles, moleskin or a purpose-made cover.
- Choose cotton or thin wool for hidden mics. Avoid silk, polyester and stiff fabrics.
- Tape a small strain-relief loop near the mic and anchor the cable where the body bends. Keep the transmitter antenna uncovered.
- Always run a movement test with headphones before you start recording.
Ready to build your own hiding kit? Start with the BUBBLEBEE Mic Hiding Starter Kit, or ask our support team to help you match covers to your mic.


